| MadMan's RC Aircraft Site HORNET PAGE 6 NEW CANOPY PICS BELOW |
It's been quite a while since I have had the time to post more Hornet data. Here are some updates:
- Put BACK IN a new CSM gyro because I didn't like the piro rate the GWS was giving me. This one
seems to work much better as I can put the gain to 30% with no wag. Still requires you to be quite nimble
on the rudder though - especially nose-in.
- Added BOOKENDS steel shaft. WOW! Makes a big difference.
- Two more tail slider disengagements. To this point I have over 60 flights on the Hornet with more than
half being outside. I have TOASTED this thing into the dirt at least 10 times, occasionally resulting in
complete dis-assembly. To date, replacements after 3 months of flying are:
- Tail boom
- Main Shaft
- E018 x 1
- Main gear (not that it needed it but 4 teeth were worn down)
Unbelievably sturdy little bastard. I have, however, gone through a gallon of acetone and 1/2 gallon of CA it
seems. The legs are also a little shorter. I have a complete supply of backup parts (not that I seem to ever
need them). Electronics wise, I have also been through 3 gyros and had a shorted MS ESC. All were
kindly replaced for free - so I am happy. Much better than when I am pissed as my e-mail rage knows no
bounds.
- New tips: 1 - Put a glob of CA or epoxy on the base of the anti-rotation bar where it sits in the hole. This
'pole', if allowed to be sloppy, causes the swash to act sloppy. 2 - Stick with the 700 mAh NiMH 7 cell
packs. Mine work great either on the supplied charger or my Hitec 335 at 1.2 Amp for 15 minutes. I get
solid 8 minute flight.
- Things to come - I ordered from Rogeleth (sp?) in Switzerland the delrin insert/ball mod for the swash
make the swash perfect. If only I could get the tail so good....
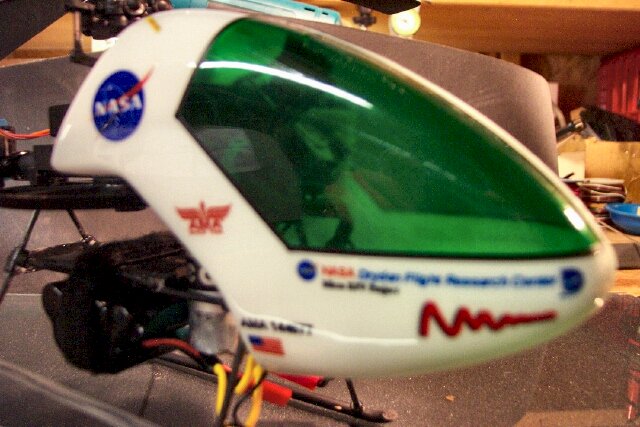
Here are pics of my new Canopy. Unfortunately, my Kodak 4800 3 MB digital camera is misbehaving on
close-ups, so some are blurry, I will fix later. It's late and I have to go out of town at 6 friggin o'clock, so
WYSIWIG for now. Here is how I did the canopy....
- I printed, in reverse, on my inkjet on VITA-CAL decal paper various logos clipped from the internet. I
sprayed them with the supplied clear (note spray heavy, not light, esp. on black letters), cut them out and
applied them to the INSIDE of the two canopy halves. THIS STUFF IS GREAT!
- I airbrushed over them from the inside with flat white Tamiya paint. This approach allows me to clean
the outside with anything and never ruin paint or decals. IT COMES OUT GREAT AND LOOKS BETTER
THAN THESE PICTURES SHOW.
- I airbrushed the windows with some green AND SCREWED ONE UP of course resulting in a 1/2
do-over. So what's new.
Anyway, that's all for now. Write me with questions via e-mail.
Still loving Hornet-land..................
MadMan
- Put BACK IN a new CSM gyro because I didn't like the piro rate the GWS was giving me. This one
seems to work much better as I can put the gain to 30% with no wag. Still requires you to be quite nimble
on the rudder though - especially nose-in.
- Added BOOKENDS steel shaft. WOW! Makes a big difference.
- Two more tail slider disengagements. To this point I have over 60 flights on the Hornet with more than
half being outside. I have TOASTED this thing into the dirt at least 10 times, occasionally resulting in
complete dis-assembly. To date, replacements after 3 months of flying are:
- Tail boom
- Main Shaft
- E018 x 1
- Main gear (not that it needed it but 4 teeth were worn down)
Unbelievably sturdy little bastard. I have, however, gone through a gallon of acetone and 1/2 gallon of CA it
seems. The legs are also a little shorter. I have a complete supply of backup parts (not that I seem to ever
need them). Electronics wise, I have also been through 3 gyros and had a shorted MS ESC. All were
kindly replaced for free - so I am happy. Much better than when I am pissed as my e-mail rage knows no
bounds.
- New tips: 1 - Put a glob of CA or epoxy on the base of the anti-rotation bar where it sits in the hole. This
'pole', if allowed to be sloppy, causes the swash to act sloppy. 2 - Stick with the 700 mAh NiMH 7 cell
packs. Mine work great either on the supplied charger or my Hitec 335 at 1.2 Amp for 15 minutes. I get
solid 8 minute flight.
- Things to come - I ordered from Rogeleth (sp?) in Switzerland the delrin insert/ball mod for the swash
make the swash perfect. If only I could get the tail so good....
Here are pics of my new Canopy. Unfortunately, my Kodak 4800 3 MB digital camera is misbehaving on
close-ups, so some are blurry, I will fix later. It's late and I have to go out of town at 6 friggin o'clock, so
WYSIWIG for now. Here is how I did the canopy....
- I printed, in reverse, on my inkjet on VITA-CAL decal paper various logos clipped from the internet. I
sprayed them with the supplied clear (note spray heavy, not light, esp. on black letters), cut them out and
applied them to the INSIDE of the two canopy halves. THIS STUFF IS GREAT!
- I airbrushed over them from the inside with flat white Tamiya paint. This approach allows me to clean
the outside with anything and never ruin paint or decals. IT COMES OUT GREAT AND LOOKS BETTER
THAN THESE PICTURES SHOW.
- I airbrushed the windows with some green AND SCREWED ONE UP of course resulting in a 1/2
do-over. So what's new.
Anyway, that's all for now. Write me with questions via e-mail.
Still loving Hornet-land..................
MadMan
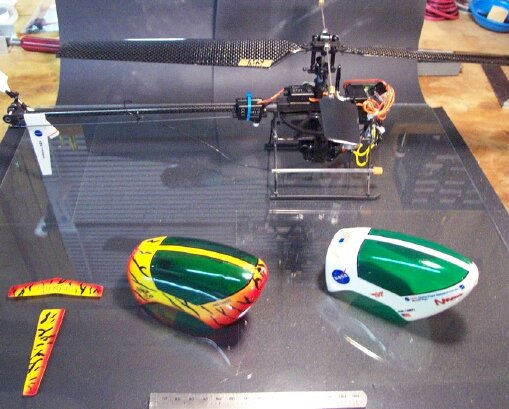
New and old - how
nice
nice
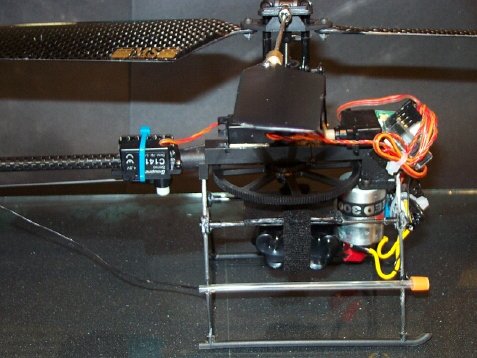
Mainframe setup
after many crashes
after many crashes
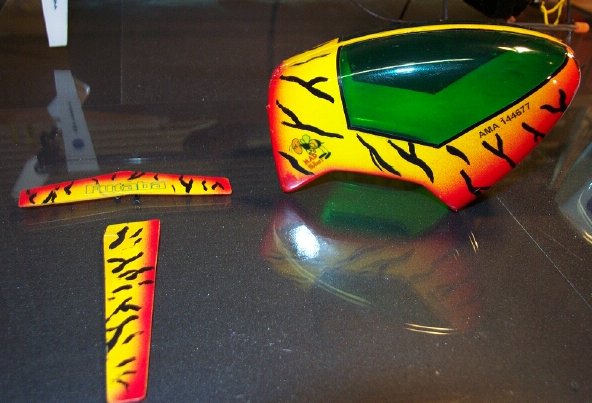
Old Canopy and
fins - still ok
fins - still ok
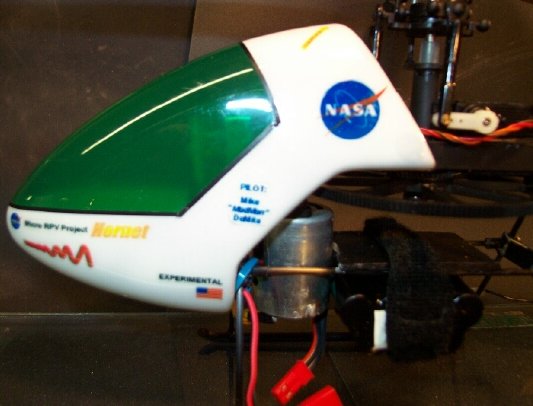
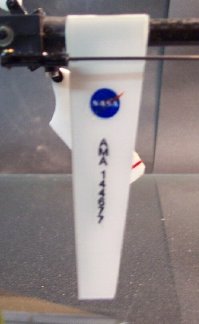
NASA theme -
reverse inside decals
used from inkjet
printer using
VITA-CAL decal set
reverse inside decals
used from inkjet
printer using
VITA-CAL decal set
New Canopy -
NASA theme -
SORRY PICS ARE
BLURRY - WILL
FIX LATER THIS
MONTH!
NASA theme -
SORRY PICS ARE
BLURRY - WILL
FIX LATER THIS
MONTH!
too much of a pain
in the a#$!
in the a#$!